A Necklace Un-Tutorial
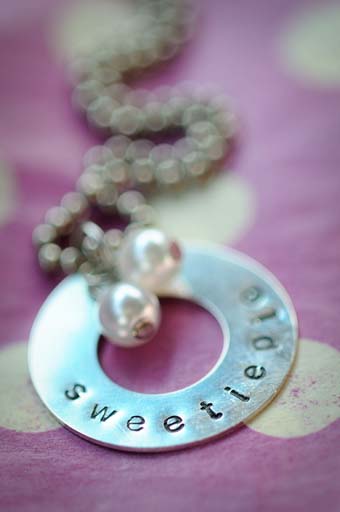
Thank you so much for all of my Valentine present love! You guys sure do know how to make a girl feel good. There were lots of questions about the little necklace for SweetiePie, so I thought I’d try to answer them. Please Note: This is NOT a tutorial. I feel you should know what you’re doing to offer a tutorial, and as you’ll soon see, I’m pretty clueless!
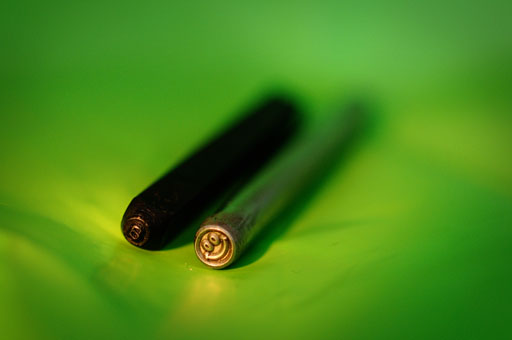
A few months ago, Beckie posted these cute little metal spoons and mentioned that metal alphabet stamps were available at Harbor Freight. That started me thinking about all the fun things that you can do with those stamps so I started searching online for a lower case set of stamps. So, first on your list of supplies, are these alphabet stamps.
When I first started searching I was only finding stamp sets for several hundred dollars (google it — you’ll see what I mean), but I kept searching and finally found this set of lowercase alphabet stamps for $18.00. That’s a huge price difference! I’m sure the more expensive sets will last longer, but since I’m not going into business or anything, even if I wear out a set or two, I’m still ahead of the game by buying the cheaper set.
I also found some really cute individual stamps at this etsy shop. (For some reason her shop is currently inactive — I hope she comes back up — there were some really cute stamps there.) I had to have the smiley face. These stamps are $10.00 each, and when pictured next to one of the alphabet stamps, you can see the difference in the metals. (Well, sort of — they’re pretty small and it’s hard to get a good picture.)
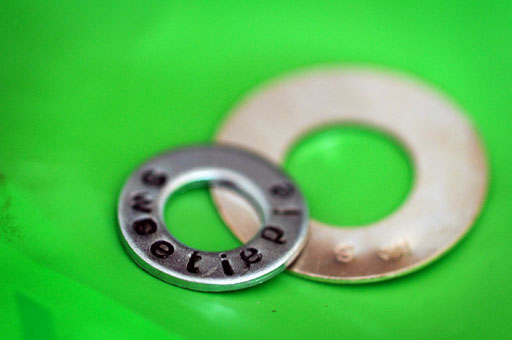
The other thing you need to make a SweetiePie necklace is a washer. You could use washers from the hardware store, but I wanted some sterling silver washers. I found some here, at Beaducation. I practiced on a little washer that I found in the garage. It went pretty well, but if you look very closely, you can see the outline of the stamp at the bottom edges of the i and the third e.
So, there’s no real technique to it (at least for me — I told you I don’t know what I was doing.) I found a patch of cement floor in the unfinished part of our basement, got down on my hands and knees (really, it wasn’t a pretty sight!) , put the washer on the floor and started placing those letters on the washer and smacking them a few times with a hammer. You do have to hold the letter very firmly. And if you remove it and didn’t hit it hard enough, oh well…too bad. It’s pretty much impossible to get the letter lined up again. (Thus the screwed up w on the sterling washer in the above picture.) I was asked how I held the washer in place — now there’s a novel concept — it didn’t even occur to me to do that. I have no idea how to keep it in place — duct tape maybe? Doesn’t that work for everything?
I’m happy to report I only screwed up two washers before I made the final version. That’s probably because I only had three washers. At $5.50 a pop, those were some expensive mistakes. (Perhaps that’s why these necklaces are so expensive to buy — to cover the cost of mistakes?) I’d really like to find some less expensive sterling washers, so if any of you find them, I hope you’ll let us all know. I might try working on hardware store washers again too — the sterling ones are nice to have though.
After stamping, I just took a permanent black marker and traced into the letters to darken them. Somewhere along the way, I read about some sort of chemical used to darken the letters, but I was in a hurry and didn’t want to mess with it. I’m sure the black in the lettering will probably wear off — if it does, we can always retrace it I guess.
As for the rest of the necklace, we have a fantastic little local bead store. When I was on my way out of town to see SweetiePie, I stopped there to grab some of their ball chain and see if they had any little pearl beads. They only had loose beads, but the lady there offered to put hooks on them for me — and she only charged me for the supplies. I was very impressed with their service. The beads are really easy to make — just string one bead on a wire and then make a loop at the top with some pliers.
Did I miss anything? I hope that was helpful. If you’ve done this stamping before and have anything to add, please chime in — I’m all ears!!!
XOXO,
Anna


