Thimbleanna

Brownies

Man…can you believe we’re at the end of February already?  Pretty amazing.  I see a lot of people writing about how sick they are of winter and they just want to see spring.  Not me.  I Love the snow.  I love being holed up at home working on projects.  Fortunately for me, winter is hanging on around here — we’ve had snow flurries all day.  Just like I like it.  I’ve been holed up working on the monogram quilt.  I’m making good progress, but I can’t show you ’cause SweetiePie has informed me that she doesn’t want to see it again until it’s done.  She wants to be surprised.  I would have loved to completely surprise her, but I had to have her opinion on a few things, to be sure that I didn’t take a wrong turn.

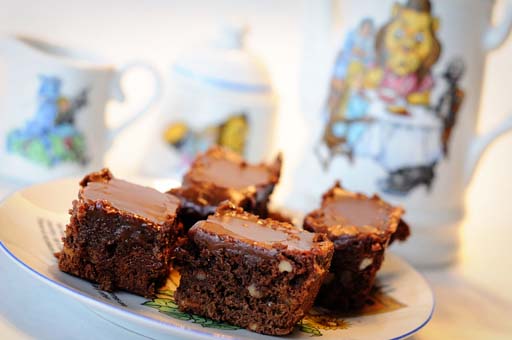
Anyway, I wish you lived next door.  I’d invite you to trudge through the snow for some tea and brownies.

Brownies

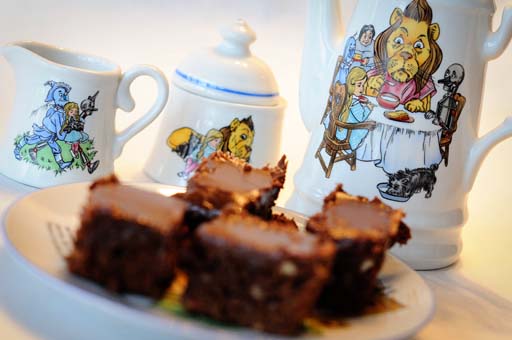
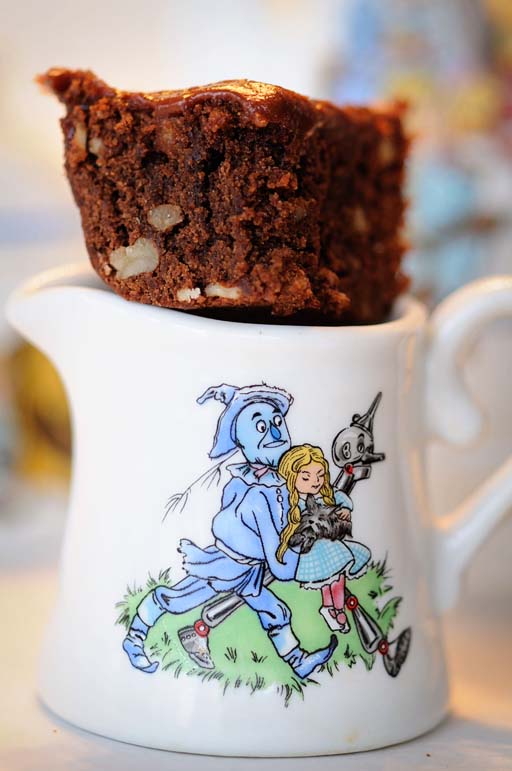
(Hey – wanna see my Wizard of Oz tea set?  There was an occasional little boy tea party when the boys were little, but it’s been sitting around neglected since then.)

Brownies

When I was little, my very favorite treat from the bakery was a brownie with icing on it.  Then, it seems that brownies with icing fell out of favor, or something, because they were harder to find.  For years, I searched for a recipe similar to those bakery brownies, but couldn’t really find one.  When the boys were growing up, I would try a new recipe and then fall back to the old faithful brownie mixes.  It’s really hard to beat a good brownie mix — they’re nice and fudgey, just like I like them.

Brownies

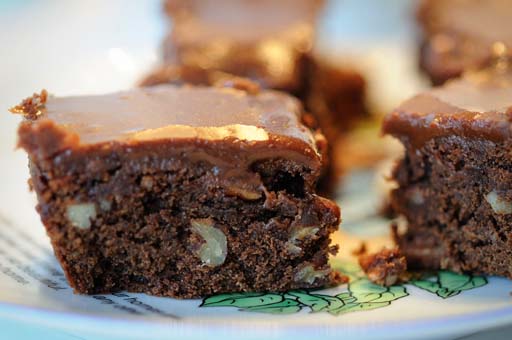
But a year or two ago, I found a recipe that I really like.  Fudgey, with nuts and with a good, chocolaty frosting.  I’ll give you the recipe while you’re here having tea with me, ’cause that’s what we do — we swap recipes.

Brownies

Frosted Brownies

Brownies:
1/2 cup shortening*
6 tablespoons unsweetened cocoa powder
2 tablespoons butter
3/4 cup sifted flour
1/2 teaspoon baking powder
1/2 teaspoon salt
2 medium eggs
1 cup sugar
1 teaspoon vanilla extract
1 cup broken pecans

In small saucepan, heat shortening, cocoa and butter until butter and shortening are completely melted. Mix well and set aside to cool.

In small mixing bowl, sift together flour, baking powder and salt. Set aside.

In large mixing bowl, beat eggs with an electric mixer until fluffy. Add sugar and mix to combine, then add cooled chocolate mixture and vanilla. Add sifted ingredients and mix well. Fold in pecans.

Pour batter into well greased 8×8 baking pan and bake at 350 degrees for 30 to 35 minutes.

Ten minutes before the brownies come out of the oven, prepare the
Frosting:

4 tablespoons butter
3 tablespoons milk
2 tablespoons unsweetened cocoa powder
2 cups powdered sugar
1/2 teaspoon vanilla extract

In small saucepan, heat the butter, milk, and cocoa until butter is melted and mixture is bubbly. Remove from heat, stir well and add powdered sugar.  Add vanilla and beat well.   If frosting is too thick to spread, add a little more milk.

Pour frosting on top of brownies while they are still hot from the oven. Cool completely in pan and then cut into 16 squares.

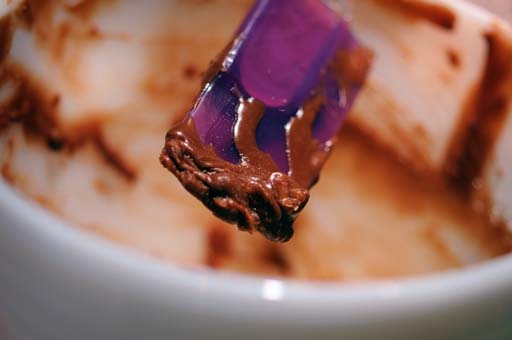
While you’re waiting on the brownies to cool, scrape the frosting bits from the bowl, mix with a few rogue pecans and then suck them off of the spatula.  Come on … you know you want to!

Brownies

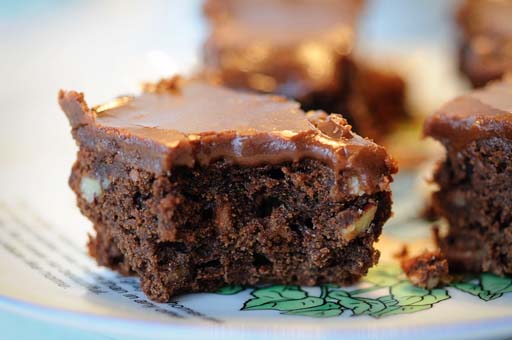
Ooops, I couldn’t wait for you to get here, so I took a bite.  Sorry.

Brownies

I probably should have asked before I made you these brownies…what’s your brownie pleasure? Caky or Fudgy? Nuts or no nuts? Frosting or no frosting? Chocolate Chunks or no chocolate chunks? (If you’re a chunky, no frosting, no nuts guest, next time I’ll try to make you these yummy looking brownies that Anne just posted today!)

XOXO,
Anna

*I know that some of you are shortening-o-phobes ’cause it’s not exactly healthy.  Here’s my take on it … you’ll probably live longer than me.  But those extra years aren’t at the beginning of your life — they’re at the end.  The end, when you’re drooling and don’t know your name.  In the meantime, I enjoyed these brownies during my shortened, happy life!  ;-P
(And please don’t be mean to me and my shortened life in the comments — it’s a joke!)

The Old and the New

Thanks for all the baby gift love!  Sometimes I wish I could work on small, quick projects all the time.  I’m sure that would get boring, but they’re so great for instant gratification.  Unlike all of my UFOs — they have delayed gratification.  It’s probably much greater gratification when it finally happens, but for me, my long-term projects, sure do take a loooong time.

At the risk of causing SweetiePie to have heart failure, I’ve resurrected my most pressing loooong term project, the wedding quilt.  I started it before TheFirstChild and SweetiePie got married, but shortly after the wedding, I got sidetracked … and somehow never got back to it.  The plan is to put the newlywed monogram on the quilt and I think that’s where it took a wrong turn.  We got locked up trying to figure out what font to use for the monogram.

Monogram Quilt

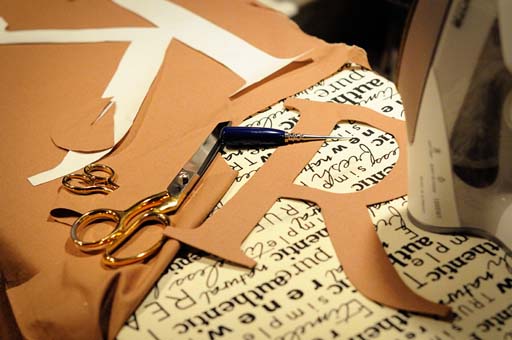
(That’s my story and I’m sticking to it.)  Yesterday, I finally dragged my big sheet of paper to work and hooked my laptop up to a projector at lunchtime, so that I could get a big enough monogram for the quilt.  I took the picture above with my cell phone, ’cause, you know, we aren’t allowed to have cameras at work.  Uh-uh.  That’s not a camera.  It’s a phone.  Say it with me now…it’s not a camera, it’s a phone.  That’s not a picture you’re looking at, it’s a phone call.

Monogram Quilt

Last night, I came home from work and started pressing and cutting.  I’m hoping I’m over the hump now and that I’ll get back to work on this quilt.  I HAVE to chip away at my UFO pile — it’s driving me nuts!

And, um, I can’t drag out a UFO and not start something new, can I?  Did you notice that Cassie is going to have a crochet-along for those adorable pillowcases that Beate at Rose Hip makes?  I’ve got some fabric and as soon as I get some thread/yarn, I’ll be ready to get started.

Pillowcases

You should join us!  Cassie promises to walk us through these pillowcases, step-by-step, and if you don’t know how they’re made, I promise you’re going to discover a cool little surprise in the technique.  Go check out Cassie’s post, grab her button, and play along with us!

XOXO,
Anna

Girlie Baby Gifts

Well, boys and girls, I hope you’re having a good weekend!  I had an awful week at work — had to work until 9 p.m. three nights this past week, so as a reward, I took Friday afternoon off and spend some time in the dungeon.  Yipee!

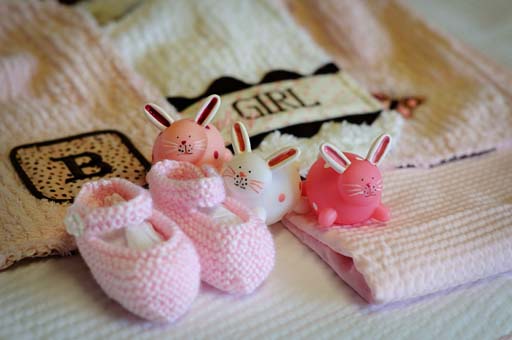
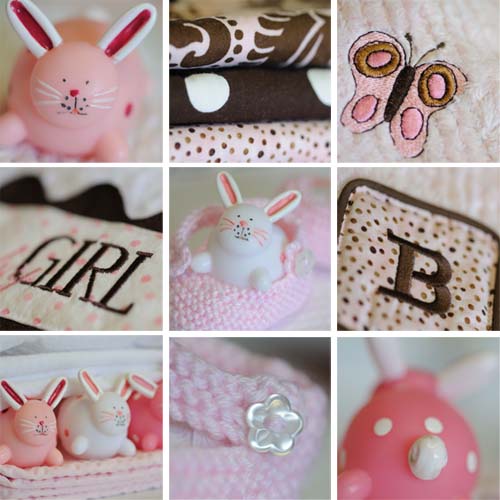
SweetiePie’s sister-in-law will be having a baby girl in May and I wanted to make her a few things.  SweetiePie gave me three words to work with — pink, brown and butterflies.  I didn’t do much with the butterfly part, but I think I excelled with the pink and brown.

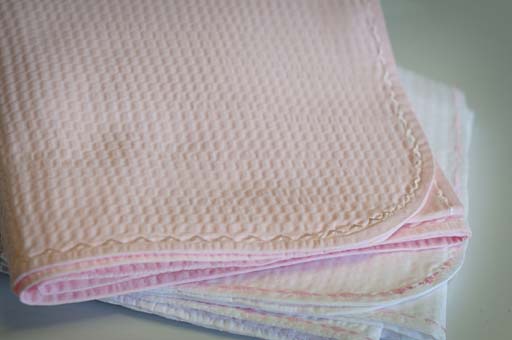
Two receiving blankets made with seersucker instead of flannel.  This will be an Oklahoma summer baby — and having had one of those myself, flannel seemed too warm to me.  A simple cotton worked beautifully for keeping the sun and wind off of the baby.

Baby Girl Gifts

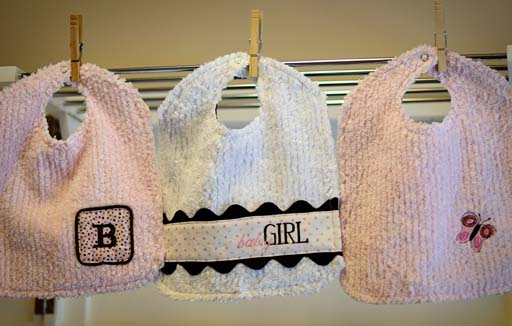
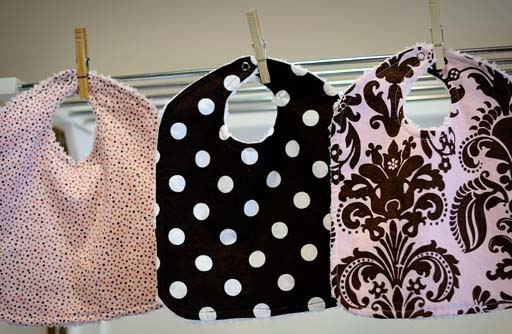
Three bibs.  I debated about whether the chenille should be the front or the back.

Baby Girl Gifts

I finally went with the front — it’s sooooo soft and I thought it would be perfect for wiping the baby’s little face.

Baby Girl Gifts

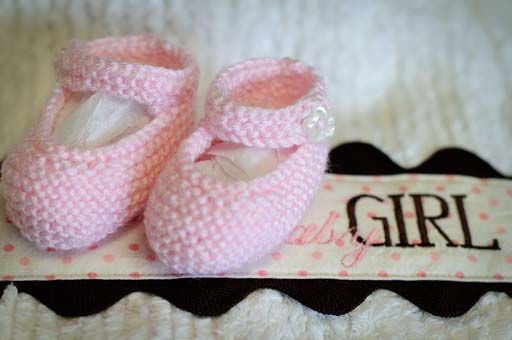
My very favorite — Mary Jane booties made from this pattern.  These will probably stay on the baby’s feet all of 15.3 seconds, but I don’t care.  They make me want to squeal from their cuteness.  There WILL be a Thimbleanna granddaughter someday to wear booties just like these.  I hope.  ;-)

Baby Girl Gifts

Throw in some little bunny tub toys, and we have a pink and brown baby gift for a girl!

Baby Girl Gifts

I think I love making baby gifts more than any other kind of gift.  They’re small and quick and fun!

Baby Girl Gifts

Now, I need to go tackle a UFO.  They’re aging while I keep playing around with fun, quick little projects.  Please send self-control and perseverance my way!

XOXO,
Anna

A Necklace Un-Tutorial

Thank you so much for all of my Valentine present love! You guys sure do know how to make a girl feel good. There were lots of questions about the little necklace for SweetiePie, so I thought I’d try to answer them. Please Note: This is NOT a tutorial. I feel you should know what you’re doing to offer a tutorial, and as you’ll soon see, I’m pretty clueless!

A few months ago, Beckie posted these cute little metal spoons and mentioned that metal alphabet stamps were available at Harbor Freight.  That started me thinking about all the fun things that you can do with those stamps so I started searching online for a lower case set of stamps.  So, first on your list of supplies, are these alphabet stamps.

Alpha Stamps

When I first started searching I was only finding stamp sets for several hundred dollars (google it — you’ll see what I mean), but I kept searching and finally found this set of lowercase alphabet stamps for $18.00.  That’s a huge price difference!  I’m sure the more expensive sets will last longer, but since I’m not going into business or anything, even if I wear out a set or two, I’m still ahead of the game by buying the cheaper set.

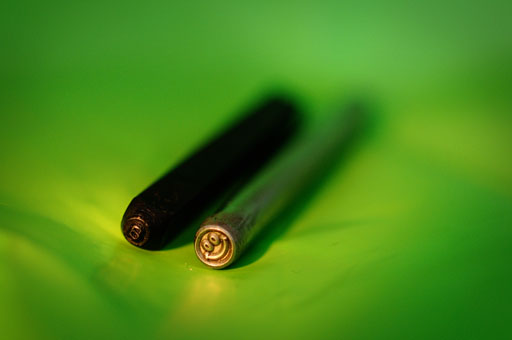
I also found some really cute individual stamps at this etsy shop.  (For some reason her shop is currently inactive — I hope she comes back up — there were some really cute stamps there.)  I had to have the smiley face.  These stamps are $10.00 each, and when pictured next to one of the alphabet stamps, you can see the difference in the metals.  (Well, sort of — they’re pretty small and it’s hard to get a good picture.)

Alpha Stamps

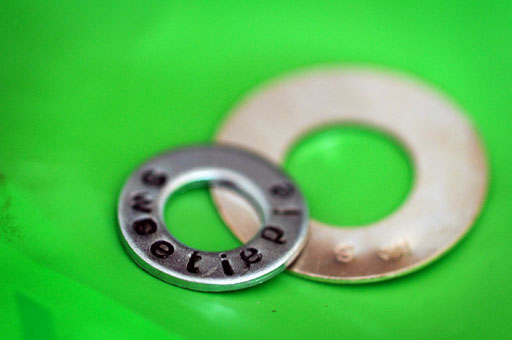
The other thing you need to make a SweetiePie necklace is a washer.  You could use washers from the hardware store, but I wanted some sterling silver washers.  I found some here, at Beaducation.  I practiced on a little washer that I found in the garage.  It went pretty well, but if you look very closely, you can see the outline of the stamp at the bottom edges of the i and the third e.

Alpha Stamps

So, there’s no real technique to it (at least for me — I told you I don’t know what I was doing.)  I found a patch of cement floor in the unfinished part of our basement, got down on my hands and knees (really, it wasn’t a pretty sight!) , put the washer on the floor and started placing those letters on the washer and smacking them a few times with a hammer.  You do have to hold the letter very firmly.  And if you remove it and didn’t hit it hard enough, oh well…too bad.   It’s pretty much impossible to get the letter lined up again.  (Thus the screwed up w on the sterling washer in the above picture.)  I was asked how I held the washer in place — now there’s a novel concept — it didn’t even occur to me to do that.  I have no idea how to keep it in place — duct tape maybe?  Doesn’t that work for everything?

I’m happy to report I only screwed up two washers before I made the final version.  That’s probably because I only had three washers.  At $5.50 a pop, those were some expensive mistakes.  (Perhaps that’s why these necklaces are so expensive to buy — to cover the cost of mistakes?)  I’d really like to find some less expensive sterling washers, so if any of you find them, I hope you’ll let us all know.  I might try working on hardware store washers again too — the sterling ones are nice to have though.

After stamping, I just took a permanent black marker and traced into the letters to darken them.  Somewhere along the way, I read about some sort of chemical used to darken the letters, but I was in a hurry and didn’t want to mess with it.  I’m sure the black in the lettering will probably wear off — if it does, we can always retrace it I guess.

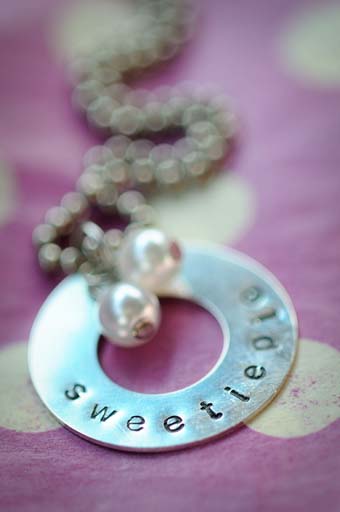
Sweetiepie Necklace

As for the rest of the necklace, we have a fantastic little local bead store.  When I was on my way out of town to see SweetiePie, I stopped there to grab some of their ball chain and see if they had any little pearl beads.  They only had loose beads, but the lady there offered to put hooks on them for me — and she only charged me for the supplies.  I was very impressed with their service.  The beads are really easy to make — just string one bead on a wire and then make a loop at the top with some pliers.

Did I miss anything?  I hope that was helpful.  If you’ve done this stamping before and have anything to add, please chime in — I’m all ears!!!

XOXO,
Anna

Little Projects

Well….how is your smiley hunt coming along?  Thanks to Leigh for pointing out this really fun Faces in Places blog in my comments.  I could spend hours looking at all the super cool smileys that people have found and submitted to that blog.  I think this is an especially fun activity if you have kids too!

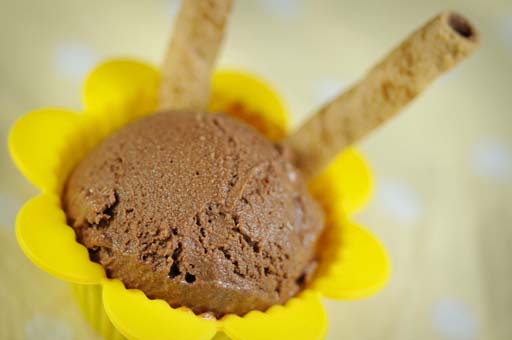
I’ve had a fun two days here in ThimbleannaLand.  Yesterday was CrazyBIL’s birthday.  CrazyBIL is crazy about Nutella (being German and all.)  In the past, I’ve made him Nutella cakes for his birthday and this year I thought it would be fun to make him some Nutella ice cream.   I wasn’t able to be here for his birthday dinner, so I packed up a little ice cream party kit (ice cream, cookies, silicon cupcake liners, spoons, candles and matches) and took it to his office for him and his co-workers to have on a little afternoon birthday break.  I really don’t like Nutella, but I thought this ice cream was pretty tasty!

Nutella Ice Cream

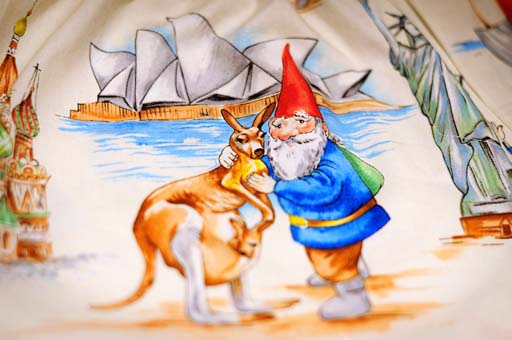
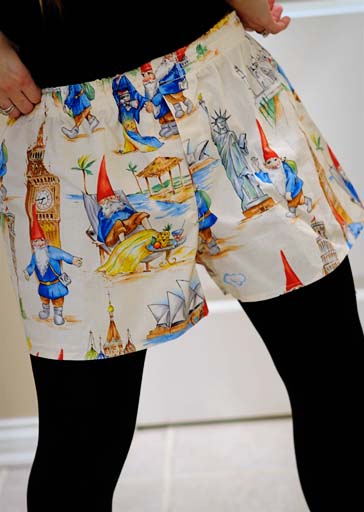
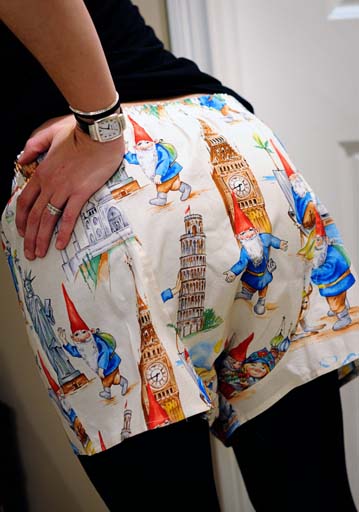
After I dropped the ice cream party off, I drove a few hours to have a sleepover with TheFirstChild and SweetiePie.  I had to go see half of my sweeties and take them a Valentine goody.  For TheFirstChild (and TheSecondChild too) I made some boxers.  I didn’t find any Valentine fabric that I liked this year, so I went with traveling gnomes instead.

Gnome Boxers

Because nothing says love like a gnome and his kangaroo.  TheSecondChild got the kangaroo gnome front and center on his boxers — in honor of his semester in Australia a few years ago.  And here is SweetiePie, modeling TheFirstChild’s valentine boxers.

Gnome Boxers Gnome Boxers

There’s even a secret message stitched near the hem.  I can’t tell you what it says though, because…well…it’s a secret!

Gnome Boxers

And for SweetiePie, I made a little necklace.  After seeing these all over blogland, I couldn’t resist making her a little bauble with my nickname for her on it.  My technique needs a LOT of work, but this was really fun to make — I’m seeing many more of these in my future.

Sweetiepie Necklace

I had a GREAT time with the kids, and I hope you’re having a good weekend too.  I also hope you all have a wonderful Valentine’s Day.  And in the famous words of Crosby, Stills, Nash and Young, “If you can’t be with the one you love, love the one you’re with.”  To me, that means YOU.  Be good to yourself.  Treat yourself to a little Valentine goody!

XOXO,
Anna